How To Tune A Guitar For Beginners
If you want to sound good then it’s very important to learn how to tune a guitar.
The guitar can easily fall out of tune due to changes in temperature, environment and regular playing
An out of tune guitar will make your songs sound off-key
How To Tune A Guitar For Beginners Basics
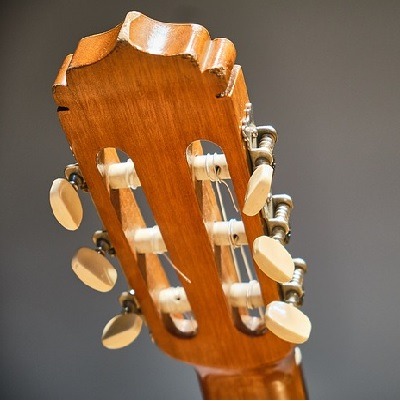
Tuning a guitar involves adjusting 6 strings on the instrument using the tuning pegs of the guitar
Standard Guitar Tuning is what we normally use to tune a guitar
Starting from the thickest, lowest-pitched string (the 6th string) at the top of neck the notes we have are:
E – A – D – G – B – E
The high E string which is the thinnest, highest-pitched string at the bottom of the neck is known as the 1st string and all others follow suit.
Here is a way to remember the string names, starting from the low “E” (string 6) to the high “E” (string 1)
E -every A- apple D-does G-good B-being E-eaten
It’s important to mention that non standard tuning of the guitar does exist however the default is standard tuning
However we’ll leave non standard guitar tuning for another day
There are various ways to tune a guitar
In this article we will cover 5 tuning methods and they are:
- Electronic guitar tunes
- Smartphone app guitar tuners
- Using other instruments
- Tuning a guitar by ear
- Tuning Fork
All these tuning methods will be applicable to any sort of guitar from electric to classical
How To Tune A Guitar Using An Electronic Guitar Tuner
Electronic guitar tuners are the best option for learning how to tune a guitar for beginners
They are designed with this single purpose in mind and are very fast and accurate
There are different types of electronic guitar tuners, some which clip onto your guitar, some which are external with a mic, some that you plug into your guitar and some that are built into your guitar
Generally speaking the interfaces of all these devices are extremely similar or the same hence we’ll only look at one device to keep things simple
In this example we’ll look at a a guitar tuner that has a mic built in
How Do Electronic Guitar Tuners Work
The way electronic guitar tuners work is that you pluck a note and the tuner shows you the note you played
The guitar tuner will show you this this in three ways:
- It will tell you the string it thinks you’re trying to tune
- It shows you with an oscillating ‘needle’ how far away from the note you are
- A red light comes on when the note is too low or too high
You need to get the needle to be in the middle and to get a green light for the note you are trying to tune

Because the needle is perfectly in the middle, the green light above it is lit. This note is perfectly in tune!
We can see it’s tuning the A string (the 5th string) because in the top left corner it says “5A”
- If the needle was over to the left, the green light would not be lit. The red light to the left of it would be lit and this would tell us the note was too ‘flat’ (too low)
- If the needle was over to the right, again the green light would not be lit. The red light to the right would be lit and this would tell us the note was too ‘sharp’ (too high)
How To Tune A Guitar Using A Smartphone App
Smartphone apps are a good cheap starting point on learning how to tune a guitar for beginners
The advantage of the smartphone apps is that you usually have your phone on you meaning you’ll always have access to a tuner
The downside is the mic your phone uses, it may not be the best quality therefore may not give the correct note %100 of the time
However there are hundreds of free and paid smartphone apps that are decent
They operate exactly the same as the microphone-based electronic tuners that we covered above
An app that I recommend is G-Strings for Android and Guitar Tuna for Iphone
Below is an example of G-Strings

It also gives you the Hz of each string
This means when you pluck a string if you get the right Hz then you are in tune, no need to know the note letter
For completeness here are the Hz settings for each string

Search around as the landscape continuously changes as there is always something faster and better out there
How To Tune A Guitar For Beginners Using Other Instruments
If you have access to another instrument it’s possible to tune your guitar to it (especially if it has a fixed tuning such as an electronic keyboard).
To learn how to tune a guitar in this way you will need to find E2 A2 D3 G3 B3 E4 on your instrument. On a keyboard or piano, E2 is two octaves below middle C4
You or a friend will need to play each note of the tuning instrument, holding down each note so that as you tune your guitar you can listen carefully for the moment the notes start to resonate and sound the same
You can do this for each note or once you have your low E string, you can tune the remainder of the notes by ear
This method will require you to be able to hear the notes so you can match them up
How To Tune Your Guitar By Ear
Every now an again you may not have access to a guitar tuner
This is a 6-step method for tuning your guitar anytime and anywhere
Step 1 – Tune the 6th string
Tune the thickest open string as accurately as you can to a low E. It doesn’t have to be perfect. Just ‘guesstimate’ what the thickest string usually sounds like
If you’re really in doubt there are loads of videos in the Internet of people playing the 6th string (E) just listen and try to get yours as close as possible
All the other strings will be tuned relative to this, so it doesn’t really matter if it’s a little sharp or flat
Step 2 – Tune the 5th string
Place your first finger on the fifth fret of the thickest (6th) string. This will give you an ‘A’ note that will sound exactly like how you want the open 5th string to sound.
You can now tune the 5th string to match the note you are holding on the 6th string
Keeping your finger on the fifth fret, gently pick both the 6th string and the open 5th string in turn, gradually turning the 5th string’s machine head until the two notes are in harmony
You need to listen carefully here. The two notes will ‘resonate’ when they match
Step 3 – Tune the 4th string
We’re going to do the same thing again here, except a string higher
Place your first finger on the fifth fret of the 5th string. This is a D note
Keeping your finger on the fifth fret, pluck the 5th string and then the open 4th string one after the other, at the same time turning the 4th string’s machine head until the note of the 4th open string chimes like the note of the fifth fret of the 5th string.
Step 4 – Tune the 3rd string
Same again. Place your first finger on the fifth fret of the 4th string. This gives a G note
Keeping your finger on the fifth fret, pluck the 4th string and open 3rd string alternately, turning the 3rd string’s machine head until the 3rd string is in harmony with the fifth fret of the 4th string
Step 5 – Tune the 2nd string
It’s different here. Place your first finger on the fourth fret of the 3rd string. This gives a B note
Keeping your finger on the fourth fret, pluck the 3rd string and open 2nd string alternately, turning the 2nd string’s machine head until the 2nd string rings brightly with the fourth fret of the 3rd string.
Step 6 – Tune the 1st string
Place your first finger on the fifth fret on the 2nd string. This is an E note
Tune the thinnest and last string to that, again by turning the 1st string’s machine head until the tone of the 1st string dings with the fifth fret of the 2nd string.
So you can see we tuned each string to the prior string. To remember this pattern, think “5 5 5 4 5”
Don’t forget the 2nd string is the only one that uses the fourth fret to tune from. All the others use the fifth fret.
How To Tune Your Guitar Using A Tuning Fork
Tuning forks are practical tuning devices because they are very small and cheap, portable and never run out of power
On the downside using a tuning fork requires a little finesse
It requires you to have a good ear to match the sound the tuning fork makes with the string you are trying to tune
The task may not be easy, but if you do it enough, you’ll eventually become an expert
Step 1: Using Tuning Fork
Hold your tuning fork by the base and whack it firmly against something hard, such as a tabletop or kneecap
Step 2: Using Tuning Fork
The base of most tuning forks have a ball on the end; if you hold that ball end against the body of your guitar, the A note (open 5th string) will ring out
Step 3: Using Tuning Fork
As the note is ringing out from the tuning fork at the same time, play an A note (the open 5th string on your guitar) and tune it to the fork’s tone
Step 4: Using Tuning Fork
Once you have the A note in tune as close as possible to the tuning fork you can then refer to the instructions of tuning strings by ear to tune the remainder of the strings
You only ever really only need one string to be in tune so you can tune the rest
By the way, it’s called a tuning fork because it resembles a fork
You can also find tuning forks that vibrate to other notes. One common fork sold to guitarists vibrates at an E however A is the most common
Finally How To Tune A Guitar For Beginners
I hope you have found this article on how to tune a guitar for beginners useful
Feel free to leave questions or comments below