Strumming Patterns
A lot of beginner guitarists get confused about how to apply strumming patterns to songs
This is because they are often given songs with no instruction on how to play them
As a result I’ve written this article to give you insight on how to apply strumming patterns using examples
Songs can be written in the form of chord progressions which can be represented as TAB or as sheet music
As strumming patterns can be easily related to time signatures this article focuses on formats that are structured
In the following examples I will use sheet music as it’s always structured.
TAB can similarly be structured however it is inconsistent
Therefore I will cover some basic musical terms you will need to know in order to progress
I understand some of you use TAB however if you can learn these musical terms and how to apply the strumming patterns it will make your life easier and faster.
These musical terms will act as a map and you won’t even need to know the song in order to be able to play it
This article only focuses on strumming patterns that have a 4/4 time signature
Therefore the strumming patterns you use from this article for future songs will depend on their time signature
Musical Terms
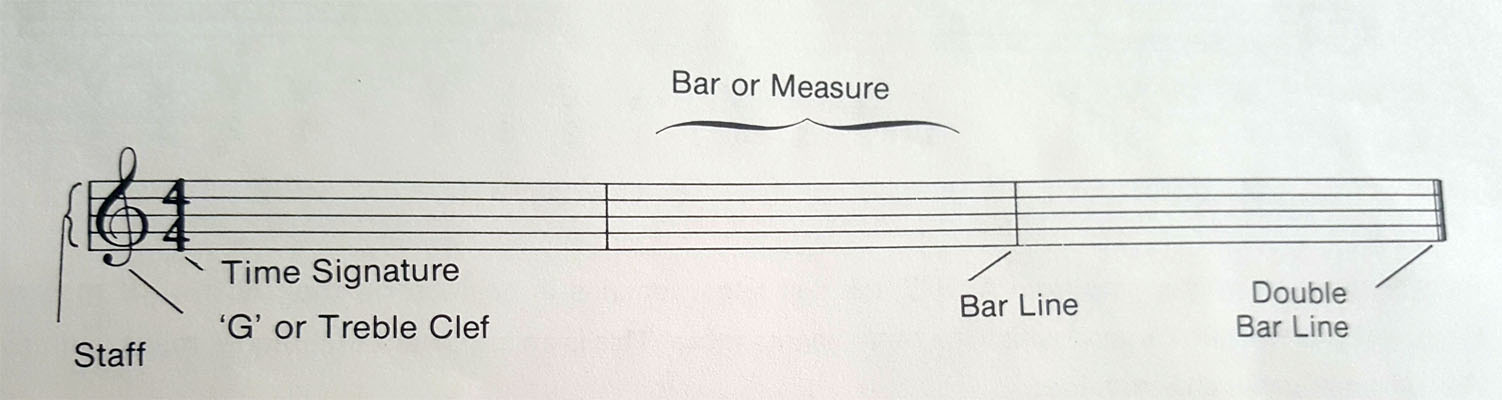
Treble Clef or G Clef: A symbol placed at the beginning of each staff of music. When you see this sign you know the music is for guitar
Time Signature: Consists of 2 numbers. The top indicates number of beats per bar, the bottom the type of beat. Only concentrate on the top for this article
Bar Line: A vertical line drawn down across the staff which divides the music into sections
Double Bar Line: This usually marks the end of a song or the end of a section
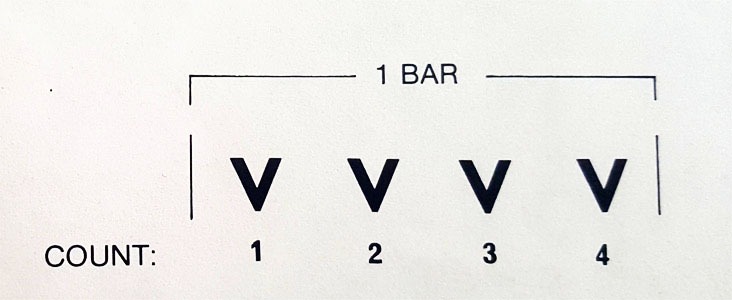
Basic Strumming Pattern
![]() This down arrow indicates one down strum
This down arrow indicates one down strum
The rhythm pattern below shows 4 down strums per bar
To help keep the beat, tap your foot as you count and strum. Remember to count evenly and in groups of 4
Applying Basic Strumming Pattern
See if you can now apply this basic strumming pattern with timing to the following diagram
As you can see the time signature is 4/4 which means 4 beats per measure
This rule is met with the 4 downward strums per measure
Use chords A and D as indicated
Remember to keep the strums even and to count in lots of 4. Repeat as many times needed

Down and Up Arrows
So far, we’ve only looked at downward strums
Upward strums are represented by an upward arrow
The way we count these is when the foot taps down we say 1 and when it goes up we say and when it comes down again we say 2, up and, and so forth
See if you can apply this to the above example. This rhythmic pattern is still 4/4 as you can see from the time signature
Remember to count and keep it nice and even

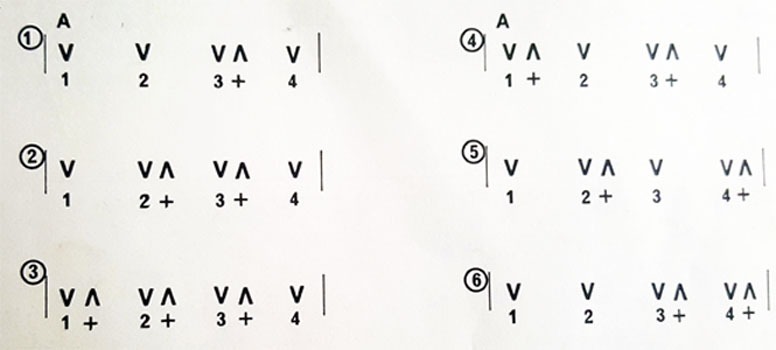
More 4/4 Strumming Patterns
Now that we get the idea of 4/4 strumming patterns
Here are some more rhythmic patterns to practice. In this example use the A chord
These examples consist of downward and upward strums
More Complex Strumming Patterns
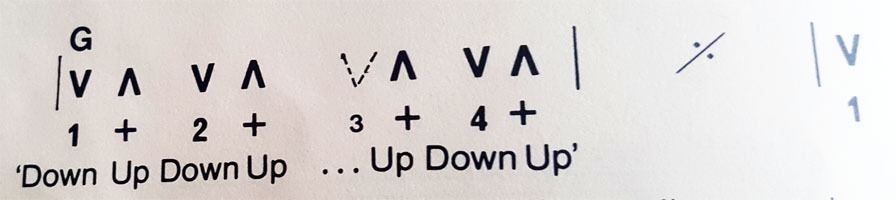
Ghost Strumming Pattern
In this strumming pattern we have a broken downward arrow on the third beat
This means that the strum on the third beat is not played
When playing this type of rhythm pattern it is important that you continue the motion of your strumming hand on the third beat as if you are playing the strings in order to keep the flow even
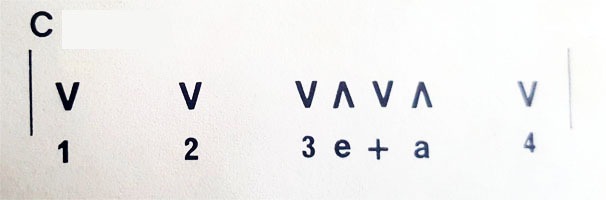
16th Note Strumming Pattern
In this strumming pattern we have 4 strums that need to occur on one beat. This beat is known as 16th note strumming
In this example, this means you need to make 4 quick strums on the third beat
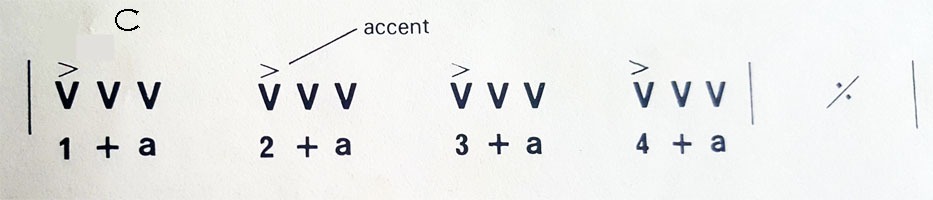
Triplet Strumming Pattern
In this strumming pattern we have 3 strums per beat. This is known as Triplet strumming
In this example, you need to make 3 down strums per beat, try and keep it nice and even
How to Apply these Strumming Patterns to Songs
So far, we’ve determined that the strumming pattern you use will depend on the time signature of the song
The strumming patterns in this article are all for 4/4 time signatures
The next step now is to get your favorite song in sheet music format with a time signature of 4/4 and play the chords above the bar on the right beat using one of the guitar strumming patterns we’ve covered
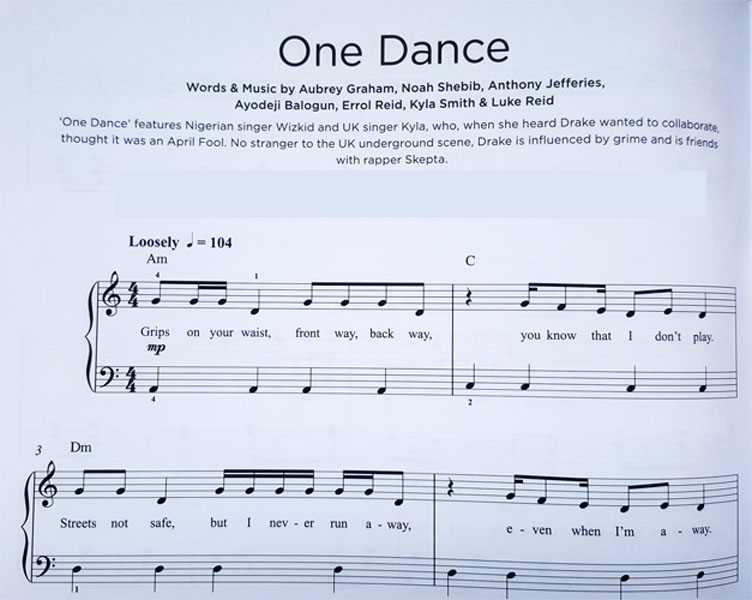
I’ve included an excerpt of ‘One Dance’ see if you can apply one of the strumming patterns to this song
We are only concerned with the time signature and the chords above the bar.
You can apply any of the 4/4 strumming patterns in the article to this example
Just remember to keep it nice and even, so tap your foot and count if you need to
For your reference the 104 in this song is the Beats Per Minute (BPM) this tells us how fast to play
You should be able to find more patterns online or ask your guitar teacher
Finally Don’t get too caught up in which strumming pattern to use
Even if you only use the basic strumming pattern you are still technically playing the song
I certainly hope this article has given you some guidance and inspiration
Feel free to leave comments or questions in the section below